Rings
An astrological wheel is simply made up of a variable number of rings. A ring is a band of space between two concentric circles, in which information can be displayed. A section of a typical astrological wheel ring is shown below. The information this ring is displaying is "Cusp Annotation".
|
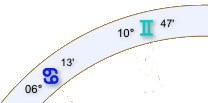
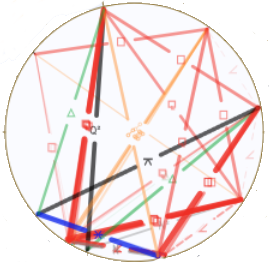
The only exception to this is the ring that graphically displays the chart's aspects. This ring is always positioned in the very center of the wheel (is the innermost ring) and therefore is able to be fully defined by a single circle rather than two - thus the single circle that defines this ring is always the last and innermost circle. The information this ring displays is "Aspect Lines".
 |
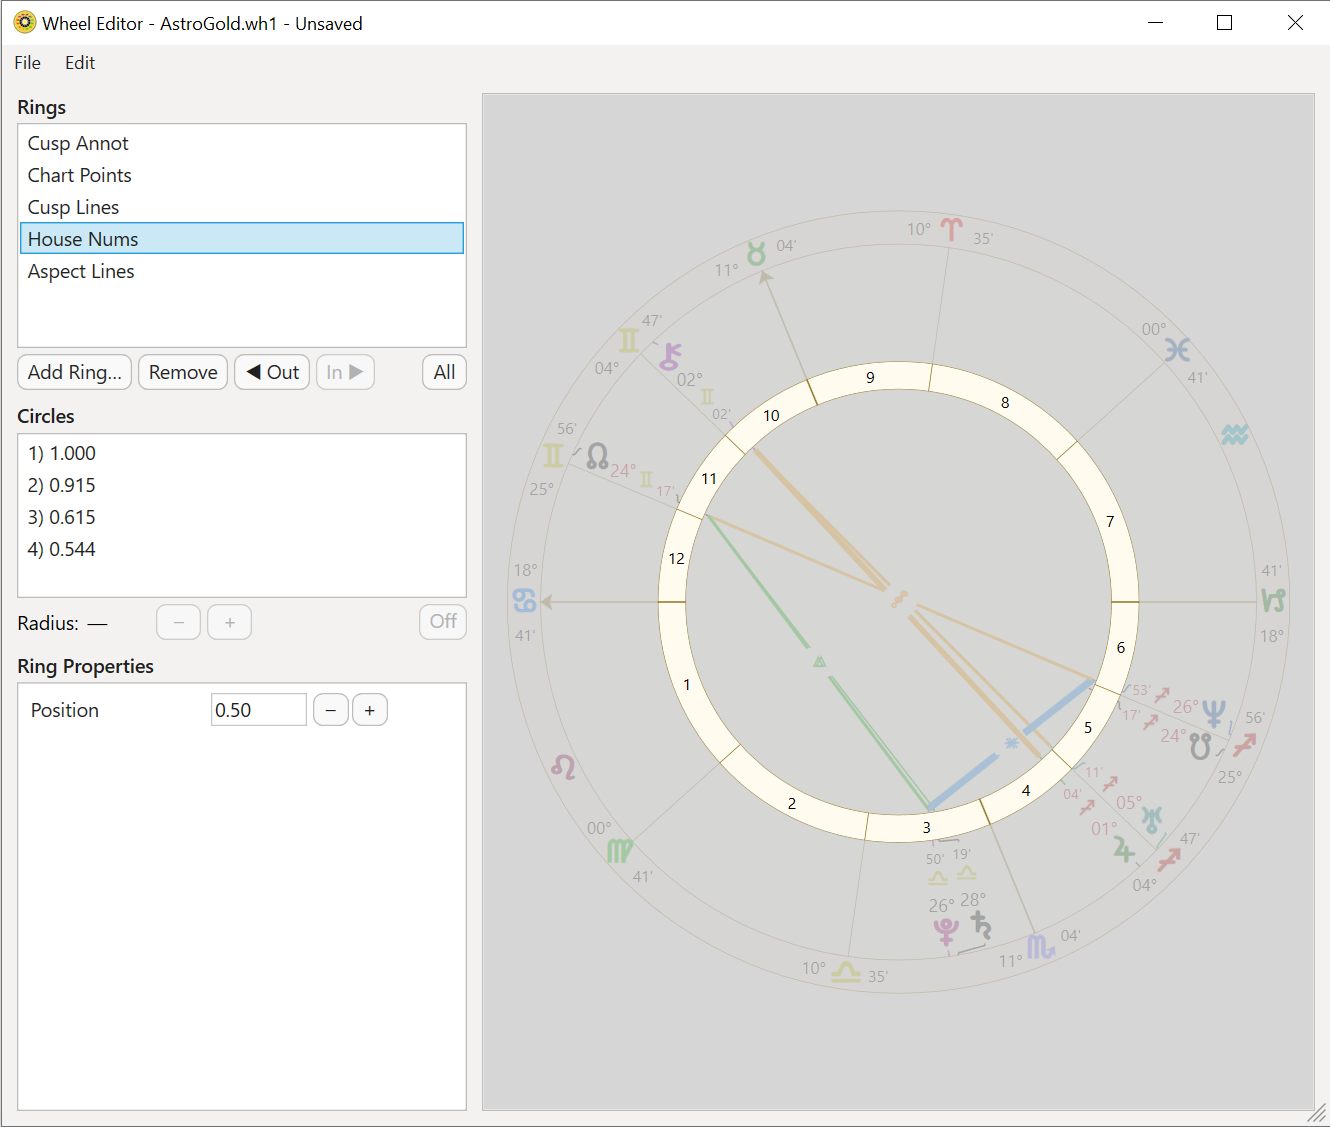
When you click on a ring in the Rings area every other ring in the wheel is greyed out, leaving the ring you selected as the only clearly visible ring. And at the same time the ring's properties are displayed in the Properties area. Click on the All button to see all the rings normally again.
|
>> How to Add rings to a wheel
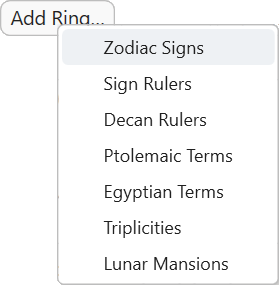
1)Click on the Add Ring button and a menu will dropdown
2)Click the specific Ring you want to add.
|
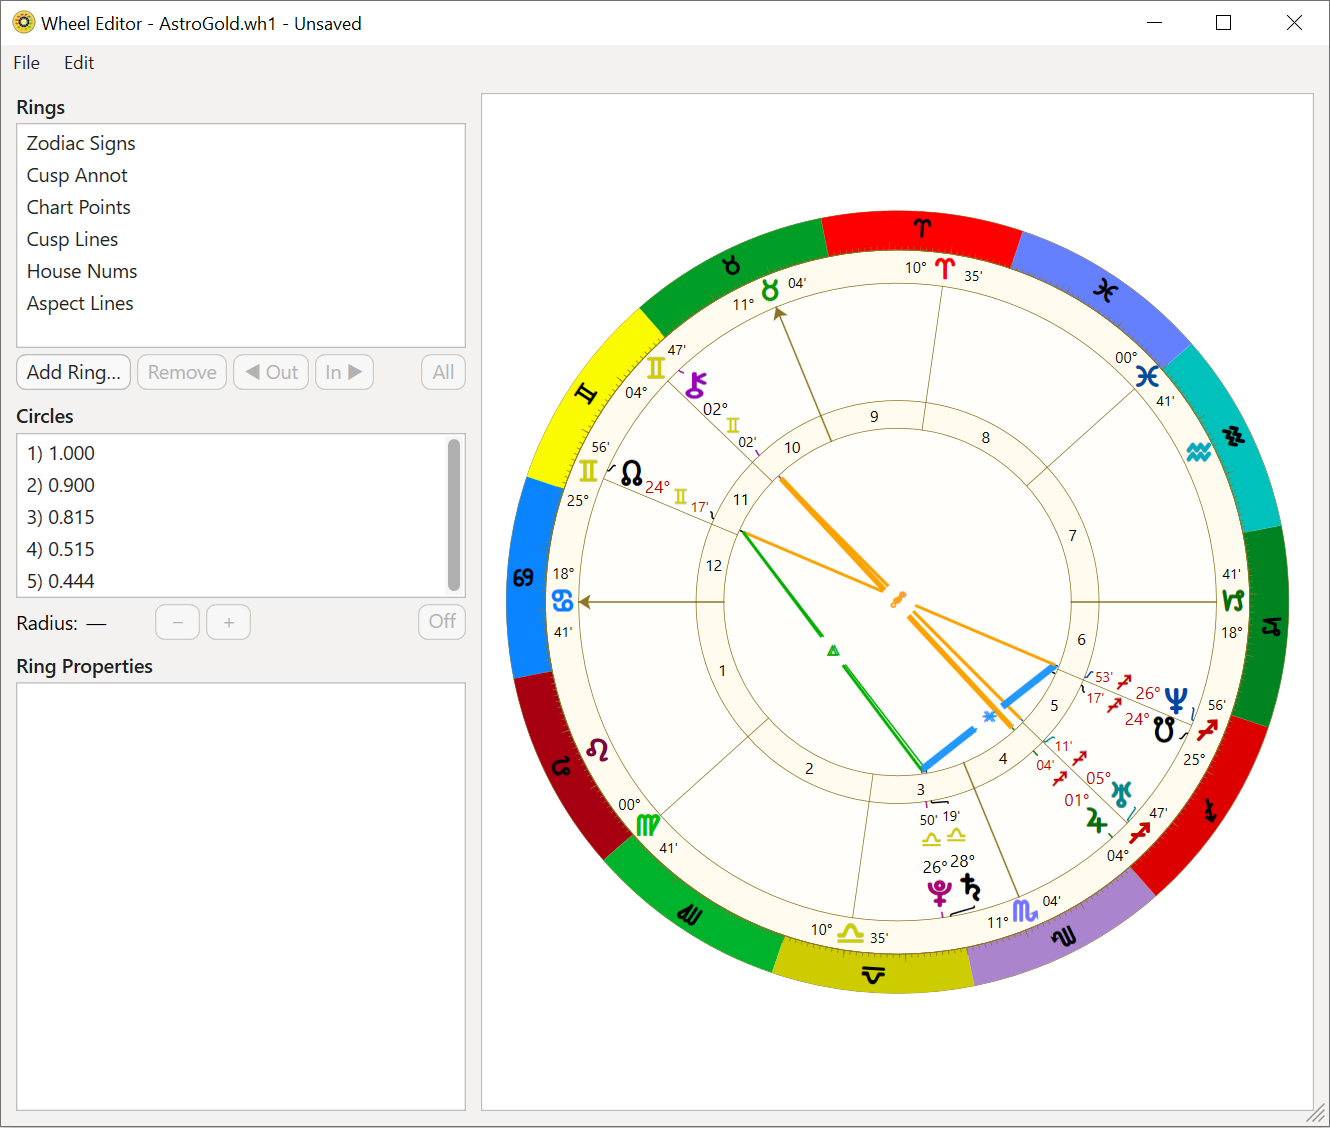
Below the Zodiac Signs ring has been added.
|
>> Multi chart Wheel Type
•When you select a Uniwheel Wheel Type the wheel being edited contains only a single astrology chart.
•When you select any other Wheel Type (Biwheel, Triwheel. Quadriwheel) the wheel being edited contains two, three or four astrology charts.
•For each additional chart there is an additional ring added to the wheel design to accommodate that additional chart's points (planets, nodes etc), displayed as "Chart Points (Cht 1)", "Chart Points (Cht 2)" and so on - where "Cht 2" is the 2nd chart.
>> How to Remove rings from a wheel
1)Click on the Ring in the Rings area
2)Click on the Remove button
|
>> To alter the position of the ring in the wheel
1)Click on the Ring in the Rings area
2)Click on the In button to move the ring one place in towards the center of the wheel, and click on the Out button to move the ring one place out towards the outside of the wheel.
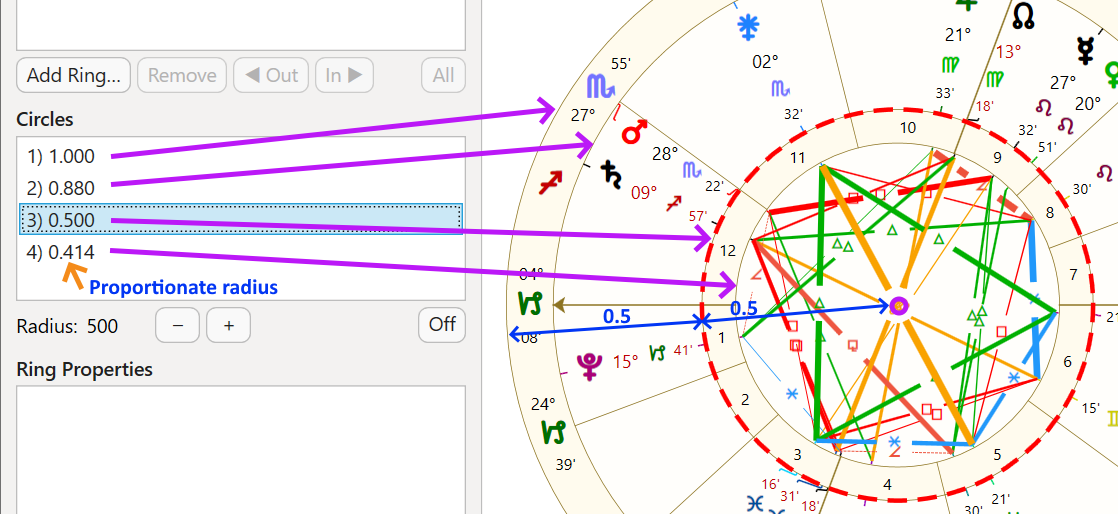
The Circles area lists the circles used to construct the rings of the wheel. Selecting a circle in this list highlights it, and also draws its corresponding circle in the wheel with a bold, dashed red line
The first and outermost circle used to build the wheel is always Circle 1. All the remaining circles exist inside Circle 1. The second circle used to build the wheel is always Circle 2 and is the second to outermost circle. And so on.
You can see to the right of each circle there is a number, which is its proportionate radius in the wheel. Circle 1, being he foundational circle, always has an absolute proportionate radius of 1.000. All the circles inside Circle 1 have a smaller proportionate radius than Circle 1, expressed as a fraction of Circle 1’s radius.
For example:
•Circle 2, with a value of 0.880, has a proportionate radius equal to 88% of Circle 1’s radius.
•Circle 3, with a value of 0.500, has a proportionate radius equal to half of Circle 1’s radius.
•Circle 4, with a value of 0.414, has a proportionate radius equal to 41.4% of Circle 1’s radius.
Below, Circle 3 which is the circle 3rd in from the outermost circle (always Circle 1), is highlighted in the list and drawn in bold dashed red in the wheel. To remove the bold dashed red highlighting in the wheel click on the  button in the bottom right of the Circles area.
Circle 3, the selected circle, has a proportionate radius of 0.500, or 0.5 in simple terms, which is half of the proportionate radius of the outermost circle, circle 1, which is 1.000 or just 1 in simple terms. What that means is that the third circle is exactly half way between the very center of the wheel and the first (outermost circle) ... 0.5 is half of 1.0.
Underneath the Circles area you can see that the selected circle (#3) has a radius of "500". This is the proportionate radius multiplied by a 1000, to make it easier when adjusting the circle's radius as you'll see next. A more simple way to view this for all circles (except Circle 1 but you can't adjust its radius anyway), is that the Radius figure is the numbers after the decimal point of the circle's proportionate radius.
|
>> Changing the size of Rings in a wheel
In the Circles area
1.Identify the circle(s) that define the ring. That is, the circles that create the outer and inner borders of the ring. You can click on any circle which will highlight where it is in the wheel, and thus see which ring it is a part of.
2.Decide how you want to change the size of the ring:
a)By making its outer circle larger or smaller => click on the outer circle of the ring in the list.
b)By making its inner circle larger or smaller => click on the inner circle of the ring list.
3.Underneath the circle area, click on either the  or the
  buttons next to the Radius figure.
a)Clicking on the button will make the circle larger - and as you do you'll see the radius of the circle increase.
i.If this is the outer circle of the ring you are changing it will increase the size of the ring (while simultaneously decreasing the size of any ring outside it)
ii.If this is the inner circle of the ring you are changing it will decrease the ring size (while simultaneously increasing the size of any ring inside it)
b)Clicking on the button will make the circle smaller - and as you do you'll see the radius of the circle decrease.
i.If this is the outer circle of the ring you are changing it will decrease the ring size (while simultaneously increasing the size of any ring outside it)
ii.If this is the inner circle of the ring you are changing it will increase the ring size (while simultaneously decreasing the size of any ring inside it)
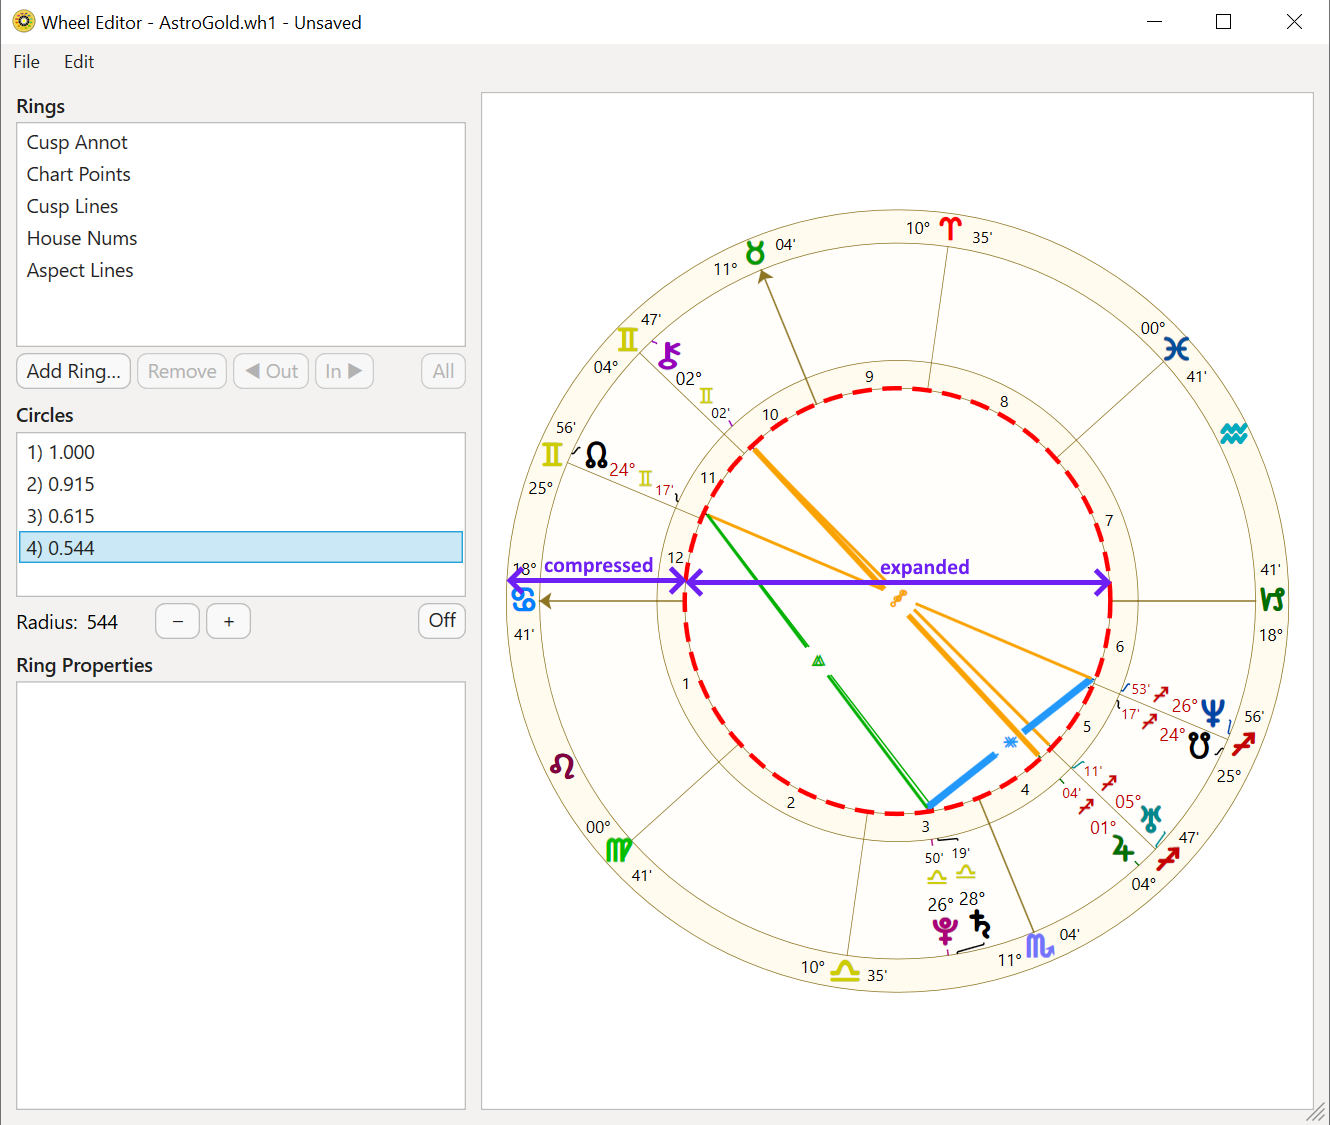
Here is an example of one possible change that could be made to the AstroGold Uniwheel design - enlarging the area for aspect lines. Immediately below is the wheel we added the Zodiac Signs ring to, and below that is the process of redesigning it to have a bigger area for the aspects.
|
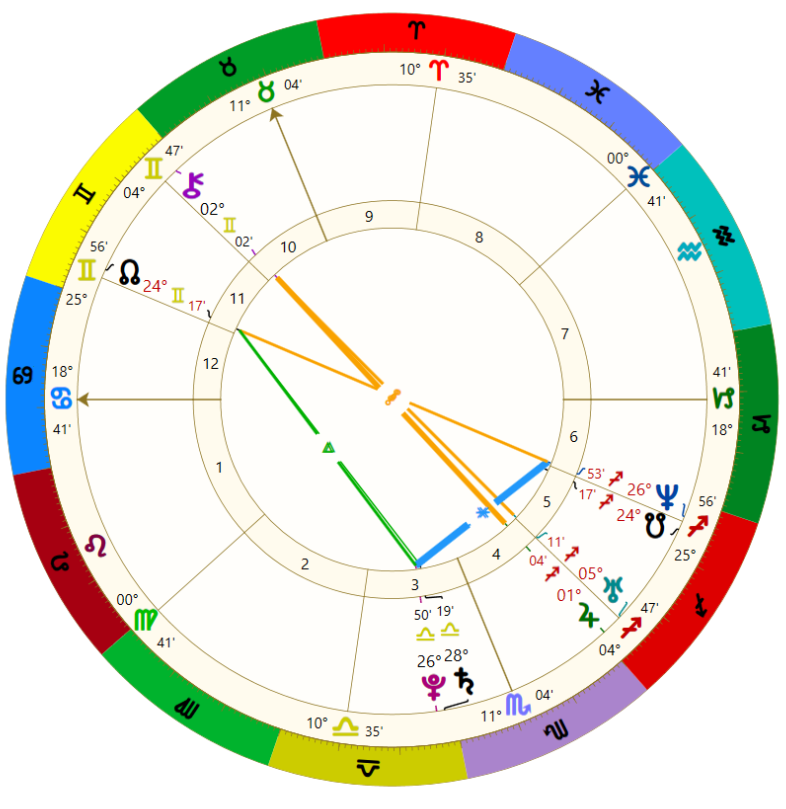
The procedure for increasing the area for aspects in the wheel was:
1.In the Rings area, click on the Zodiac Signs ring, then click on the Remove button.
2.In the Circles area, click on Circle 2, then click repeatedly on the button until the "Chart Annotation" ring is narrowed as much as possible while still leaving room for the glyphs.
3.Click on Circle 3, then click repeatedly on the button until the "Chart Points" ring is narrowed as much as possible while still leaving room for the glyphs, degrees and minutes.
4.Click on Circle 4, then click repeatedly on the button until the "House Numbers" ring is narrowed as much as possible while still leaving room for the numbers.
➢ The Ring that Circle 4 (highlighted below) is the outer circle of (in other words the inner central ring, "Aspect Lines"), will now have a much greater area available for itself.
|
|
Properties
>> Changing the properties of Rings in a wheel
1.In the Rings area click on the Ring you want to set properties for. This will highlight the ring in the wheel, and display the properties for the ring in the Properties area.
2.Most of the properties are self explanatory. When changing the property value you can immediately see the effect of the change in the displayed wheel.
To get the retrograde symbol Πto appear in the chart:
1)In the Rings area, in the list click on Chart Points.
2)In the Properties area, click on the dropdown list to the right of Display Items.
3)Select Degs/Mins/Retro.
|
|
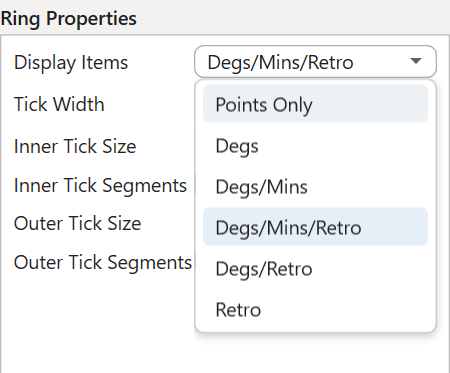
NOTE: You will need to do this for every ring that contains chart points that you want to display the retrograde symbol in.
For example, for a biWheel, in the Rings area you'll need to select Chart Points (Cht 1) and edit its Display Items property, then also select Chart Points (Cht 2) and edit its Display Items property, etc.
>> Undoing or Redoing your changes
1.Click on the Edit menu.
➢ To undo your last change click on Undo, or press Ctrl+Z (press the Control key down, hold it down and press the Z key, then release all keys).
➢ To redo the last change you undid, click on Redo, or press Ctrl+Y (press the Control key down, hold it down and press the Y key, then release all keys).