Displayed (chart points) is where the chart points can be selected for showing in charts and reports. The Lilith available is the Black Moon Lilith (see Calculation Methods).
|
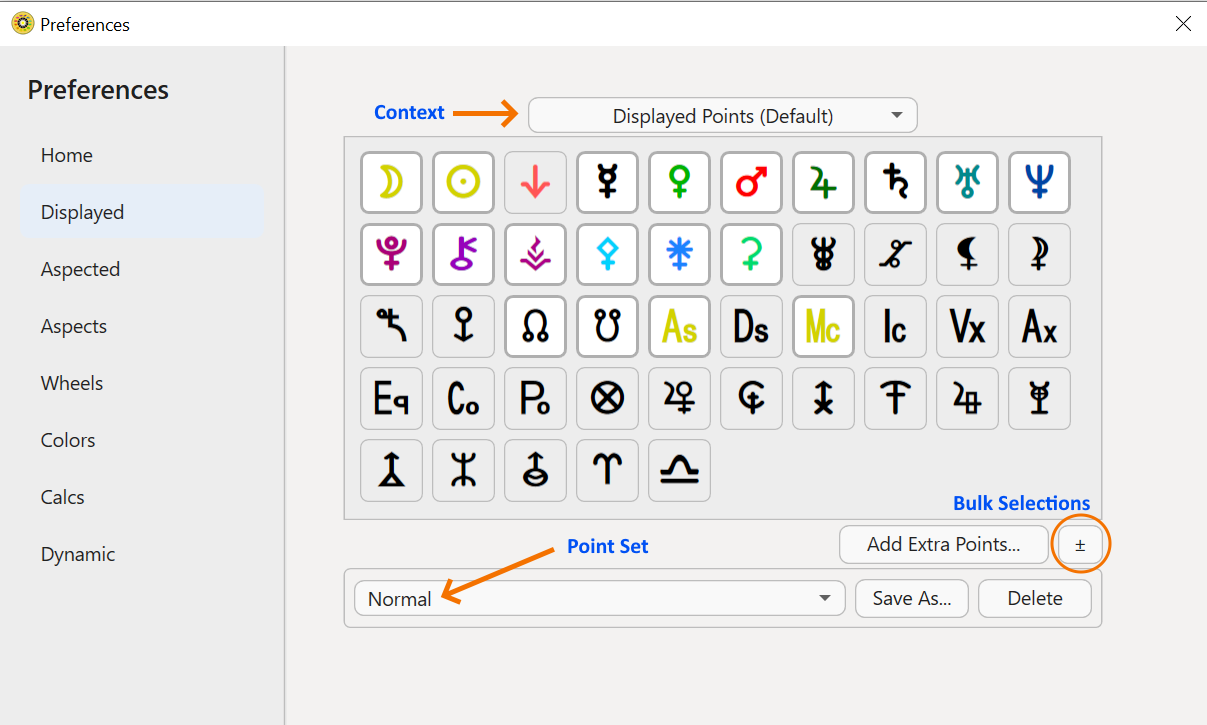 Preferences - Displayed Points |
Main Points
You can view the glyphs for the main points available for selection directly in the Preferences window. If you hover the mouse over each glyph its name will pop-up.
These main points are, in order, from left to right, starting at the top row:
Moon |
Sun |
Vulcan (hypothetical) |
Mercury |
Venus |
Mars |
Jupiter |
Saturn |
Uranus |
Neptune |
Pluto (planet/dwarf planet) |
Chiron (asteroid/comet) |
Vesta (asteroid) |
Pallas (asteroid) |
Juno (asteroid) |
Ceres (asteroid) |
Hygeia (asteroid) |
Astraea (asteroid) |
Black Moon Lilith |
White Moon |
Sedna (asteroid) |
Eris (dwarf planet) |
Lunar North Node |
Lunar South Node |
Ascendent |
Descendent |
Midheaven |
Imum Coeli |
Vertex |
Anti-Vertex |
Equatorial Ascendent |
CoAscendent |
Polar Ascendent |
Part of Fortune |
Cupido (hypothetical) |
Hades (hypothetical) |
Zeus (hypothetical) |
Kronus (hypothetical) |
Apollon (hypothetical) |
Admetos (hypothetical) |
Vulcanus (hypothetical) |
Poseidon (hypothetical) |
TransPluto (hypothetical) |
Aries Point |
Libra Point |
|
|
|
|
|
NOTE: Hypothetical planets (except Vulcan) are also called TransNeptunian planets and are used in Uranian astrology. Additional dwarf planets and asteroids can be selected via Extra Points.
The White Moon is known as Selena (see Calculation Methods for more info).
Contexts
Displayed points are used in several different situations or contexts.
The main contexts are:
•Default - for Natal charts (and all other charts not falling into the categories below e.g. Return charts)
•Transits - for Transit charts and Dynamic transits
•Progressions
•Arc Directions
For each one of these contexts a pre-saved set of displayed points (Point Set - see below) can be specified to always be used in that context.
To choose the context click in Context dropdown, situated above the points. When you do this a menu will be displayed with the above four options listed, with a tick next to the currently selected context.
|
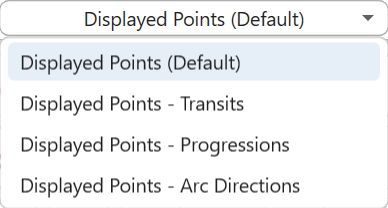
When any of the specialist Contexts (i.e. Transits, Progressions, Arc Directions) is selected a checkbox labelled "Follow Default" appears to the right of the Context dropdown icon.
|
|

•If this is ticked, then when a specialist context is selected it means that the Displayed Points for that specialist context will be temporarily copied from those of the default Displayed Points (the first item on the list).
•When it is subsequently unticked the Displayed Points for that specialist context will revert back to what they were originally for that specialist context (i.e. have nothing to do with the default Displayed Points - the first item on the list).
Point Sets
➢ You turn a point "on" (or select it for use in the Point Set) by clicking on it - continuously clicking on each point turns it alternately Off (grey background) or On (white background).
➢ To select certain groups of similar points all at the same time, i.e. make bulk selections, click on the  button to the right of the "Add Extra Points..." dropdown. The following menu will be displayed:
|
|
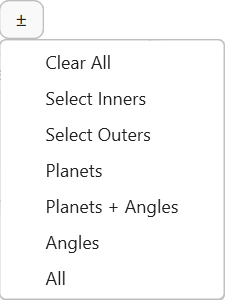
This allows you to select whole groups of points at once, instead of one point at a time. Once selected you cannot un-select that group of points - you need to manually un-select each point in that group, or choose "Clear All" to un-select all points at once.
➢ At any point in time, the points currently turned on in the "Displayed" window can be saved as a "Point Set" for instant retrieval in the future. You do this by clicking on the Save As button and giving the Point Set a name that describes that set of points. If the "Save As" button is greyed out, it means the displayed points currently turned on are already saved as a set.
Once that is done the Point Set will appear in the in the dropdown list of "Point Sets" at the bottom of the dialog. When dropped down, the full list is displayed, and you can then re-choose that (or any other Point Set) by clicking on its name in this list.
➢ To delete any Point Set you have saved, select it in the list of "Point Sets" at the bottom of the dialog first (which will then change the currently selected "Displayed Points" to those of that Point Set) - then click on the Delete button. This will delete the Point Set from the list, but the selection of points it contained, and now displayed on the screen, will stay exactly as it is - that is, the points that are turned on are now are the currently active "Displayed Points" for the Context selected.
You can also see in the screen-shot below, that the specified Point Set to display when transits are involved, either in a chart or listing, is the Point Set called "Outers/Slow", consisting of Jupiter, Saturn, Uranus, Neptune, Pluto, Chiron and the lunar Nodes.
|
|
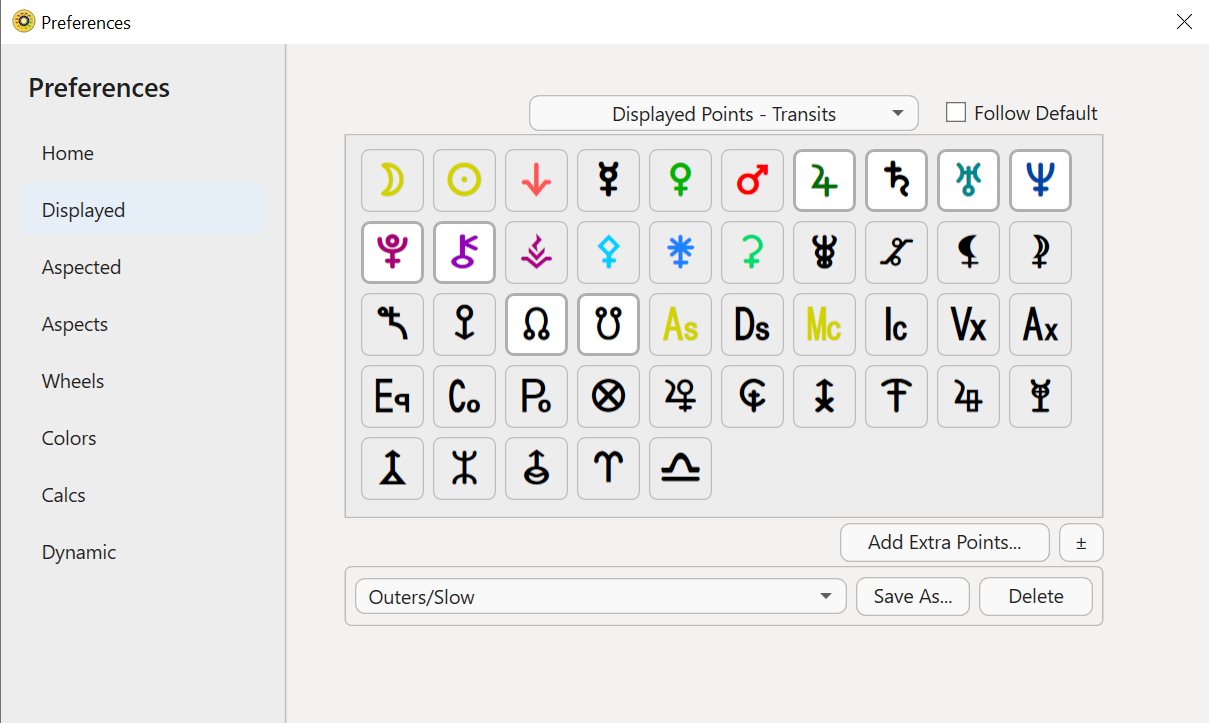
For each context (Default/Transits/Progressions/Arc Directions), when that context is selected, you can change what points will be displayed in that context by changing the Point Set to use at the bottom of the dialog box.
Astro Gold comes supplied with four sets of pre-saved Displayed Point Sets:
•Inners/Fast
•Outers/Slow
•Planets & Asteroids (+Nod/Asc/MC)
•Planets & Chiron (+Nod/Asc/MC)
Finally, whenever you want you can always override the Point Set specified for a Context, by manually turning individual points on or off. The changes will be immediately reflected in any displayed chart or data for that context, regardless of whether you save these displayed points as a new Point Set or not.
When you do this, the Point Set textbox at the bottom will become blank (unless all the points you have manually turned on happen to have previously been saved as a Set).
For any of the Contexts, not only can you specify what Point Set you want to be displayed, you can on the fly also hand pick extra points to be included in the Points Set.
The types of extra points that can be used are:
•Midpoints
•Minor bodies e.g. Centaurs, Dwarf planets and Asteroids
•Arabic lots/parts
•Stars
•Fixed Zodiacal points
•Planetary Nodes / Apsides (planet distance from Earth or the Sun) - annotated with the planet glyph and ☊ / ☋ or a P / A superscript
List of minor bodies
The Jessica Adams Roman asteroids available
|
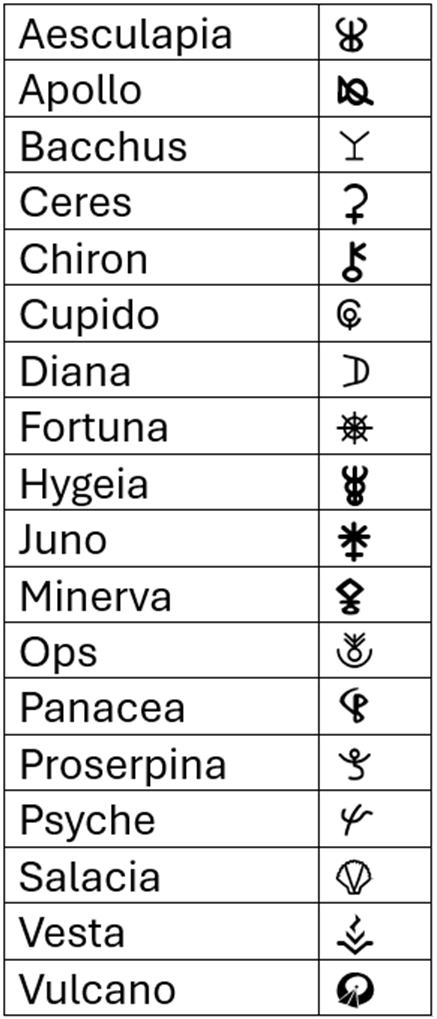 Jessica Adams Roman asteroids |
ALL asteroids available (includes the Jessica Adams asteroids)
|
 ALL Asteroids |
NOTE:
a)The Dwarf planets are Ceres, Pluto, Haumea, Makemake, and Eris.
b)If you have downloaded the available additional minor points, then as well you will be able to choose from an extra 71 Asteroids (Martha Lang Westcott's) and 42 Centaurs & Dwarf Planets (Zane Stein's).
>> To select Extra Points to be displayed
1)Click on the Add Extra Points button. The following window is displayed.
|
|
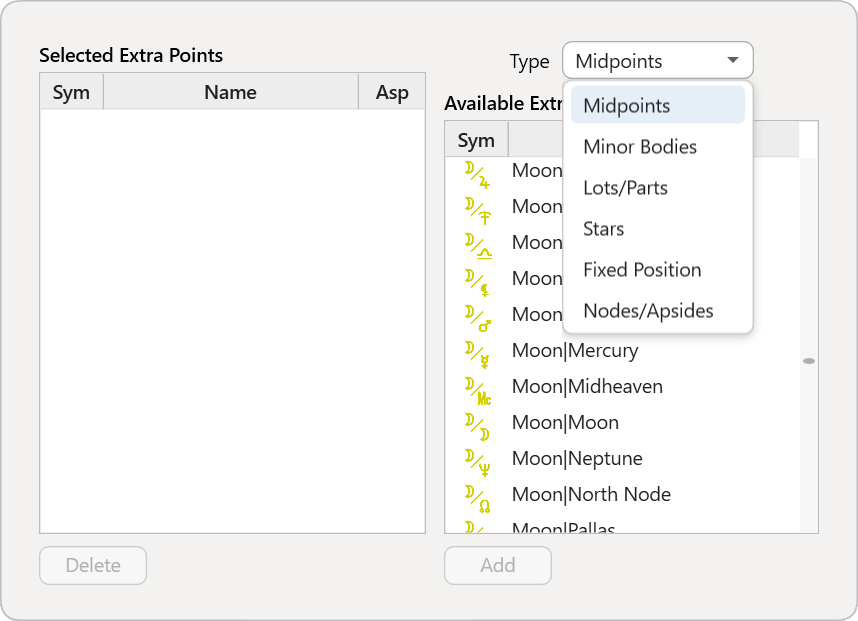
2)Click in the Type of Extra Points dropdown list, and select the one you want to work with.
3)In the "Available Extra Points" list click on an extra point you would like include for the selected Context, then click on the Add button (alternatively you can just double-click on the extra point and it will be added straight away).
4)To remove an extra point from the list of "Selected Extra Points" click on the extra point in that list, then click on the Delete button.
5)Finally, for each point in the list of "Selected Extra Points", if you want it to also receive aspects, click the checkbox to its right in the column titled Asp until there is a tick in it. If you don't want it to receive aspects click in the checkbox until there is no tick in it.
6)When you are finished with this window, click on a blank area of the "Preferences" window, which will close the "Extra Bodies" dialog.
7)You will now need to save this Point Set (which now includes the Extra Points you have selected). Click on the Save As button, enter a name for the Point Set, then click on the OK button.
a) Some of the minor bodies are known as Dwarf Planets
b) The midpoint listings/trees in Astro Sheets only show midpoints between standard (built-in) chart points, so extra points are excluded from them. When you add extra points to your Displayed Points these extra points will not show up in the Sheet midpoint listings and trees.