Colors in Astro Gold can be applied to all parts of the displayed chart wheel.
|
|
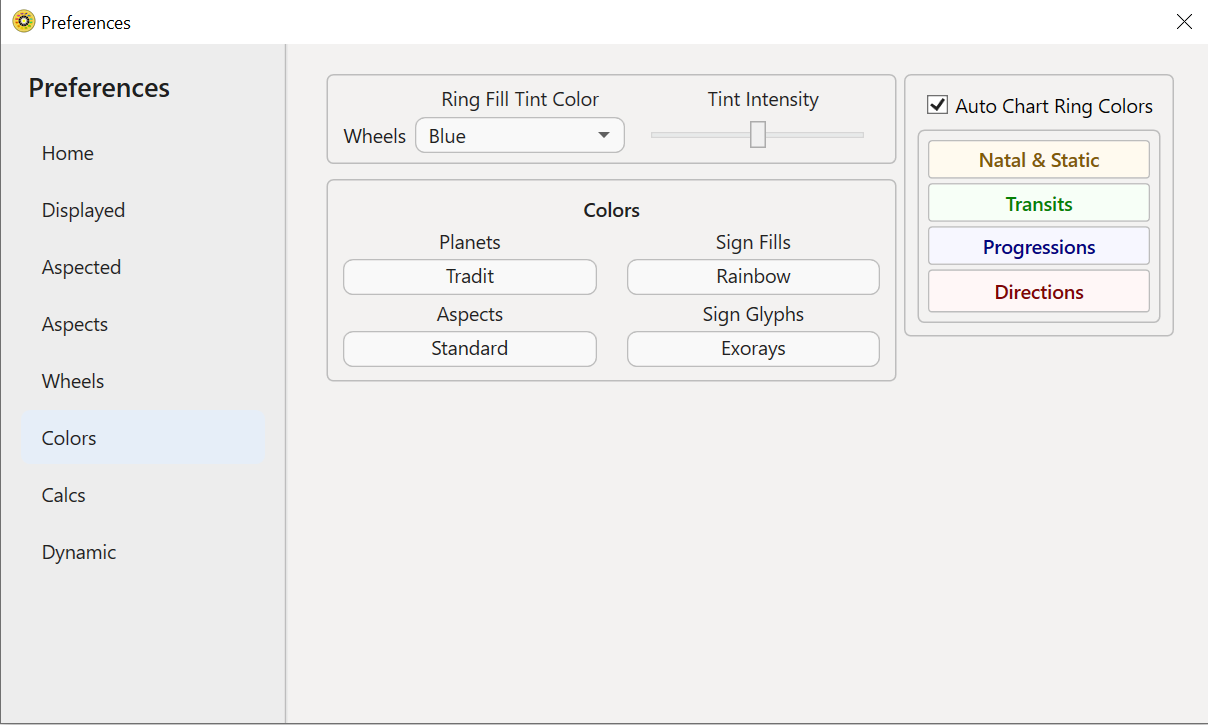
Wheel Ring Fill Tint Color and Intensity
|

Choose the color tint and color intensity used for coloring in the wheel rings in the Ring Fill Tint Color dropdown list.
The color chosen will be the default color for all chart wheel rings, with the intensity for the innermost ring(s) and the outermost ring double that of the rings in between them.
In a usual wheel design that means the inner House numbers ring, and the outer Zodiac Signs ring (or the Cusp Annotations ring), are tinted with twice the intensity of this color as any other middle rings that are between them. Below there are two middle rings between the doubly more intensely colored inner and outer rings.
|
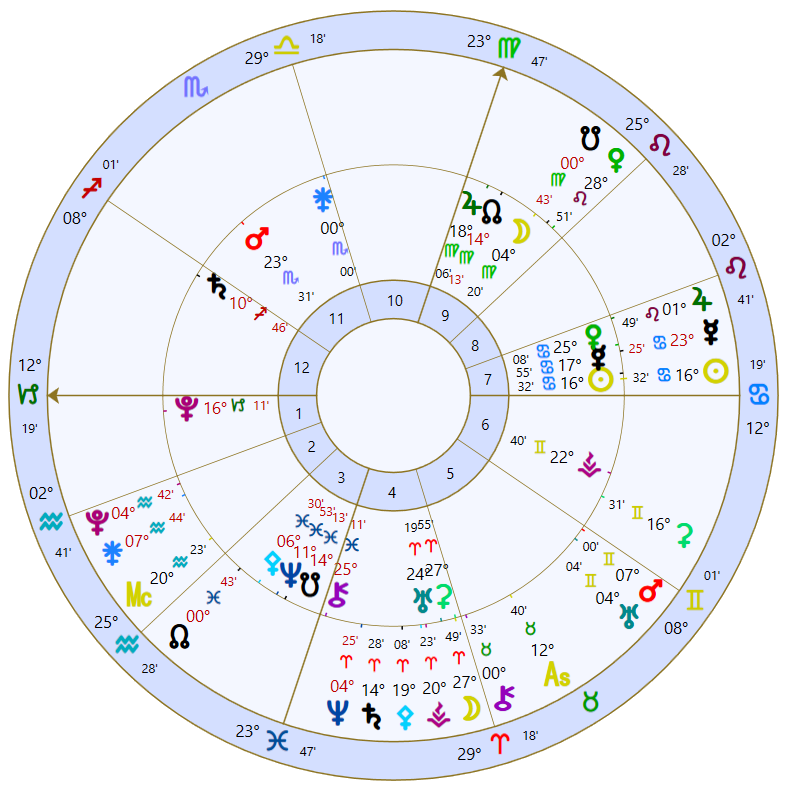
You can specify in the "Auto Chart Ring Colors" setting, if this same color is used to tint all the wheel rings displayed (regardless of the color intensity) - as above for example. Or if it is used to tint only the innermost ring(s) and the outermost ring.
Auto Chart Ring Colors
|
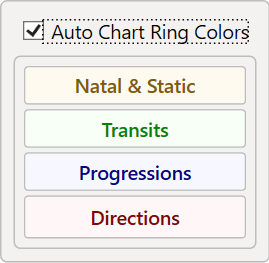
NOTE: These auto chart ring colors are permanent and cannot be changed by the user.
>> Determining what color a chart ring will be in the displayed wheel/dial in the Viewing Area
For each chart in the "Selected Charts" pane, the actual color of its Chart Details text, and its ring color in the wheel or dial in the Viewing Area, will be based on two, possibly three, considerations:
➢ its position in the wheel - is it Chart 1, Chart 2, Chart 3 etc: the innermost wheel/dial ring(s), and the outermost wheel/dial ring and will always be the color set in the "Ring Fill Tint Color" setting. And this color will be doubly as intense as any other ring colors, regardless of what their color might be.
➢ if the Auto Chart Ring Colors is switched OFF: if it's switched off then there are no further considerations. The color of every ring in the displayed wheel or dial will default entirely to the "Ring Fill Tint Color".
➢ if the Auto Chart Ring Colors is switched ON: if it's switched on, then the outermost wheel/dial ring and the innermost wheel/dial ring(s) will be the color set in the "Ring Fill Tint Color" setting. However any middle rings between them will be the color specified for their chart type in the "Auto Ring Chart Colors" grid.
Charts which don't change over time, like natal and return charts, are regarded as Static charts; compared to transiting, progressing and directing charts which are constantly changing as time passes (so are called Dynamic charts). These Dynamic charts each have their own color to make then stand out in the wheel or dial.
Planet, Sign and Aspect Colors
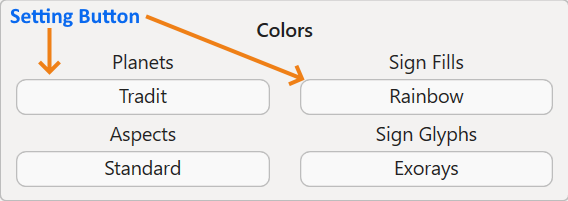
You can also choose different Planet, Sign glyph and fill, and Aspect colors. And you're not limited to just one lot of colors for each of these parts of an astrology chart. For each part you can create different sets of colors then save those sets under names you give them, and then reuse these sets of colors for that part of the chart anytime you want.
To do this click on the setting button for the chart part (Planets, Sign Glyphs, Sign Fills, Aspects) you want to select colors for, e.g. Planets. When you do a dialog with all those items (e.g. planets) pops up (see below).
|
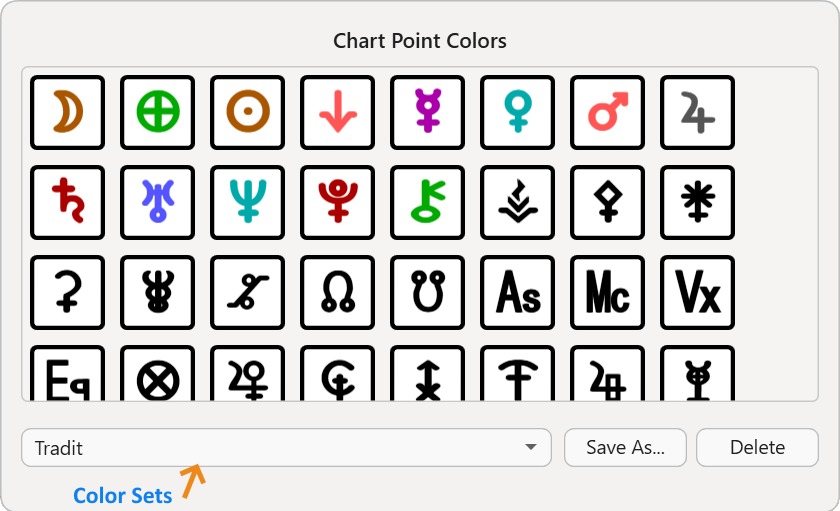
➢ Click in the Color Sets dropdown list to select, from all the available color sets, one you want to use for choosing the colors from - to assign to the particular chart part (Point, Sign glyph, Sign fill or Aspect) items you are setting colors for.
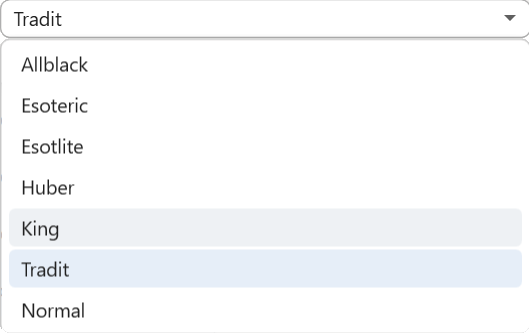 Chart Points Color Sets |
You are not limited to using the existing Color Sets though, as you can design and make new Color Sets for Points, Sign glyphs, Sign fills and Aspects.
You do this by designing the color for each individual <Point/Sign/Sign fill/Aspect> item in turn, and then saving all the colors used as a Set, called anything you want to call it. Then that set of colors is added to the other Color sets in the dropdown box for that chart part.
>> To Design Specific Colors for individual <Point/Sign/Sign fill/Aspect> items
In the Color dialog displaying those items, click on the particular item you want to choose a color for (e.g. in the "Chart Points" dialog shown above click on, say, Jupiter).
When you do the Color Designer will open so you can create the color you want for that particular Chart Point item - in this case Jupiter.
|
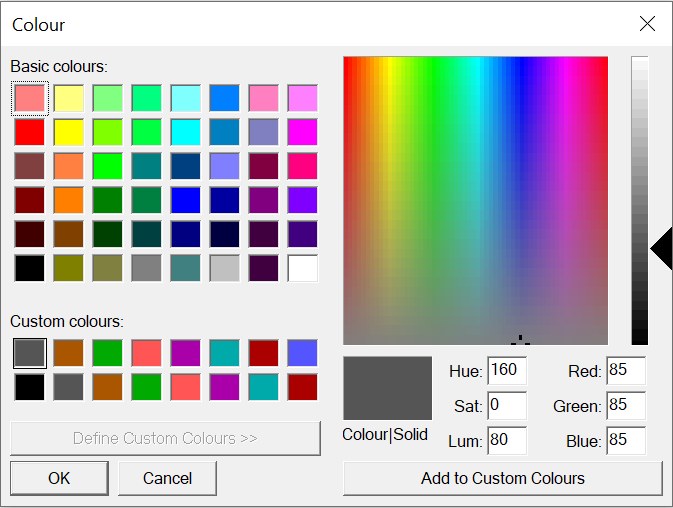 The Color Designer |
Designing the color is basically just a case of clicking on the color you want, then altering the lightness of the color using the slider at the right-hand side. Or you can enter different values into the Red/Green/Blue or Hue/Sat/Lum textboxes.
If you click in the Color Field (the large square multi-coloured block on the right) a pointer appears where you clicked. You can then drag this pointer to different parts of the field to change your color family more precisely. Dragging the pointer from left to right changes the hue: red → yellow → green → cyan → blue → magenta → red. Dragging the pointer from top to bottom changes the saturation: vivid colour → increasingly grey/desaturated. Use the slider on the right to change the lightness.
|
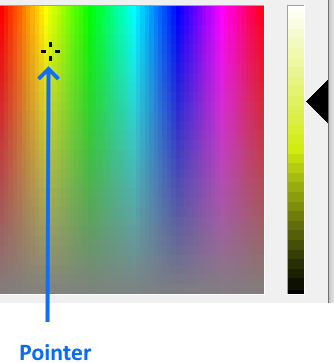
Once you have created a color you want to use (it's showing in the smaller rectangle under the Color Field called "Color/Solid") click on the OK button, and it will immediately be applied to the item in the dialog you were designing a new color for. For example the Point (Jupiter) you initially clicked on in the dialog.
If you want to save that color in the Color Designer so you can use it another time for another item (e.g. Venus), click on the Add to Custom Colors button.
NOTE: Custom Colors are only saved for the current session.
Below we have created a different color for Jupiter...
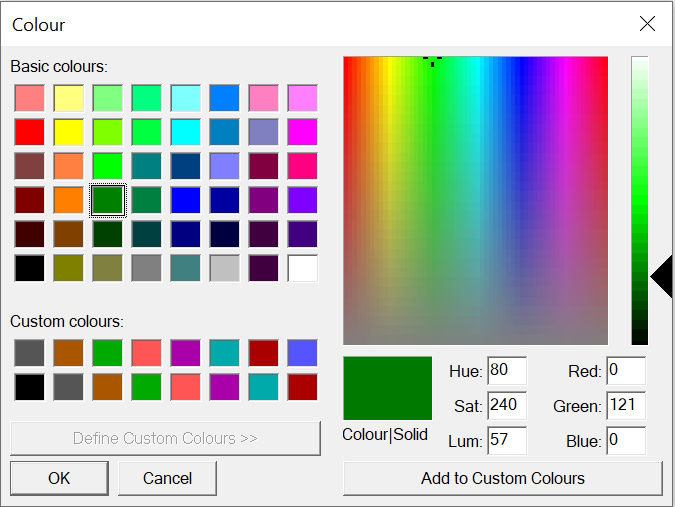 The Color Designer |
Clicking the OK button displays the Chart Points dialog, with Jupiter now a dark green, not a dark gray.
|
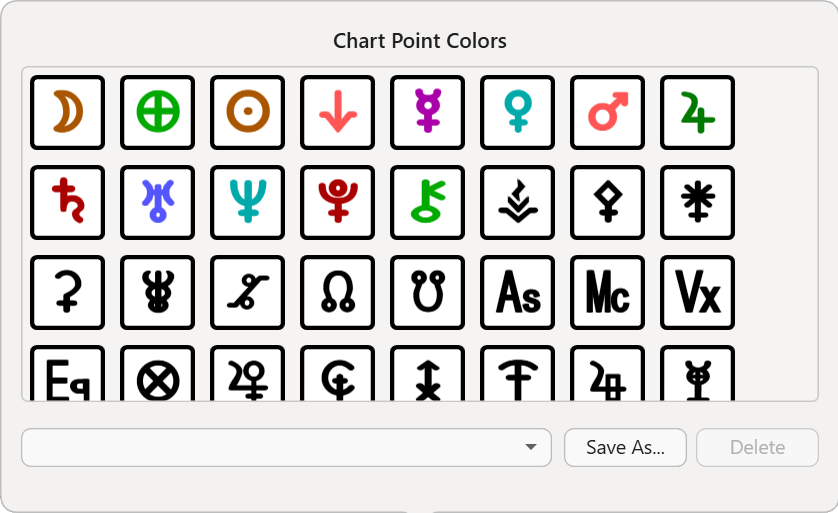 Jupiter with a new color |
Notice how the "Color Set" dropdown is now blank - it doesn't display the "Tradit" Color Set anymore, which was the name of the Color Set we selected before we changed the color of Jupiter from dark gray to dark green.
This is because the set of colors now displayed for each of the Points is not the same as that shipped under the name of "Tradit". It is now not a saved Color Set, but it could be saved by clicking on the Save As button and giving it an appropriate name e.g. "Tradit 2".